Enabling Background Recording on Android with Expo: The Missing Piece.
For many mobile developers, adding background recording on Android using Expo has been a big headache. This feature is really important for apps that need to keep recording even when you’re not actively using them or you are running them in the background.
Usually, most solutions online suggest ejecting from the expo workflow, which can make things complicated and take away the ease of using an Expo-managed workflow.
But what if there was a simpler way to do this without all the hassle? In this article, I will be showing you how to enable this feature without leaving the comfort of the Expo-managed workflow.
Getting Started: Essential Requirements
Before we dive into the solution, let’s ensure you have the right setup to follow along with this guide:
- Expo SDK Version: You need to be running at least Expo SDK 51. This is the version I’ve tested with, and I can’t guarantee it will work with older versions.
- Development Build: Make sure you are running a development build of your app, not Expo Go.
Installing Required Packages
Next, you’ll need to install a couple of essential packages that extend Expo’s capabilities:
- @notifee/react-native: This package enables the use of foreground services to keep your app awake and recording, even when it’s not actively in use. It’s crucial to prevent Android from putting your app to sleep in the background.
- @expo/config-plugins: With this plugin, you can simplify your development process by automatically configuring your native project settings to support additional modules, reducing the need to manually tweak your native code.
Run
npm install @notifee/react-native
npm install @expo/config-plugins
Configuring the Android Manifest
Because we need to access the microphone information in the foreground service using @notifee/react-native, the package says we update the AndroidManifest.xml.
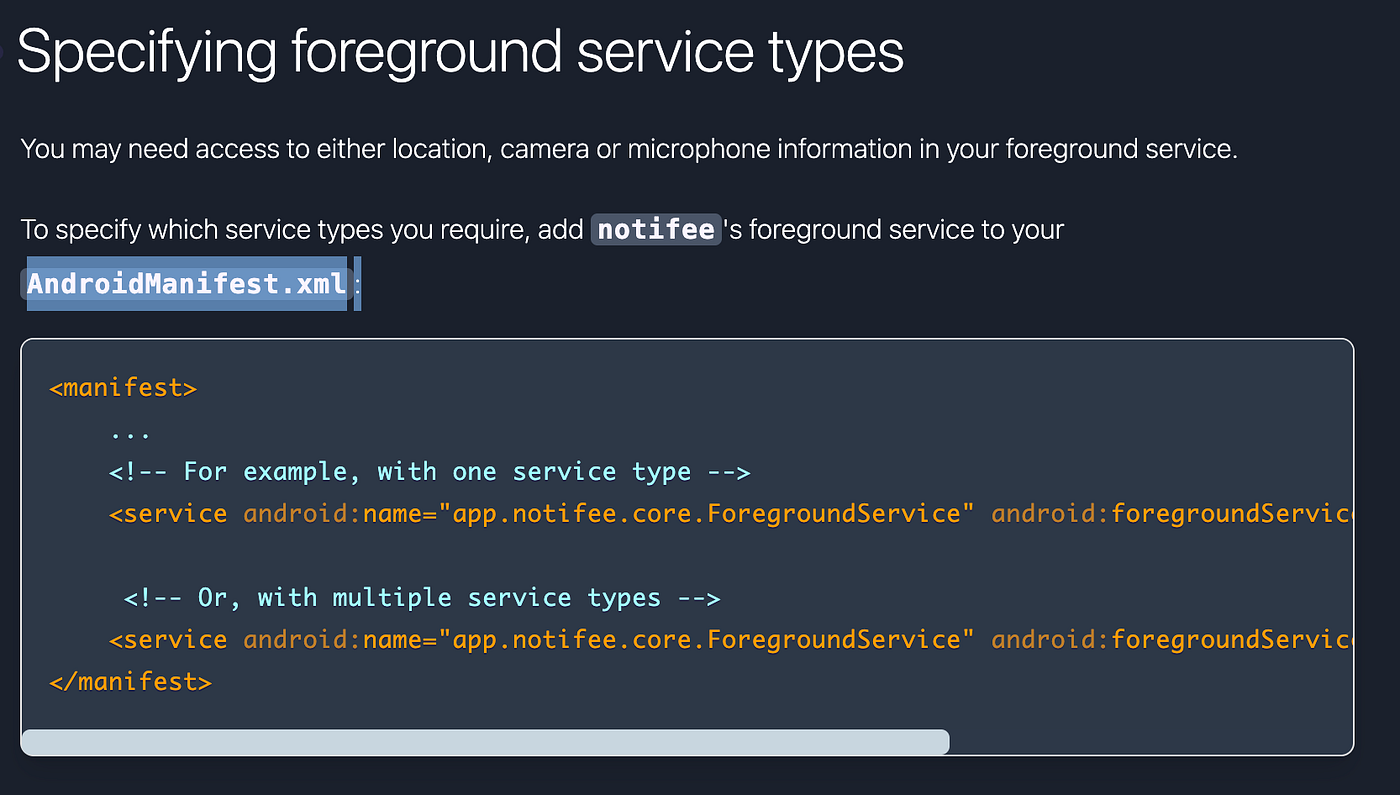
Since we’re working within the Expo-managed workflow, direct modifications to the AndroidManifest.xml aren't possible. However, there's a seamless workaround to update our manifest at build time using a config plugin.
To achieve this, you’ll need to create a JavaScript file say android-manifest.plugin.js at the root of your project. Here’s how it works:
- Purpose: This file will use
@expo/config-pluginsto inject necessary permissions and configurations into theAndroidManifest.xmlduring the build process. This step is crucial for allowing your app to access the microphone in the foreground service, as required by@notifee/react-native. - Implementation: You will write a custom config plugin in this file that specifies the necessary service information and permissions. This plugin is then automatically applied when you build your project, ensuring that your app has all it needs to perform background recording effectively.
const { withAndroidManifest, AndroidConfig } = require("@expo/config-plugins");

const withForegroundService = (config) => {
  return withAndroidManifest(config, async (config) => {
    const manifest = config.modResults;

     if (!manifest.manifest.$["xmlns:tools"]) {
       manifest.manifest.$["xmlns:tools"] = "http://schemas.android.com/tools";
     }

    const mainApplication =
      AndroidConfig.Manifest.getMainApplicationOrThrow(manifest);

    mainApplication["service"] = mainApplication["service"] || [];
    mainApplication["service"].push({
      $: {
        "android:name": "app.notifee.core.ForegroundService",
        "android:foregroundServiceType": "microphone",
        "tools:replace": "android:foregroundServiceType",
      },
    });
    return config;
  });
};

module.exports = withForegroundService;
Integrating the Custom Plugin
To finalize the setup and ensure that your app’s Android manifest is properly updated at build time, you need to integrate the custom from android-manifest.plugin.js with your app.config.ts file. This step connects the configuration changes to your Expo project.
Here’s how to wrap your app configuration with the newly created function:
- Open your
app.config.tsfile: This file typically manages your app's configuration across platforms. - Import and use the custom plugin: Modify the file to include and apply the custom plugin you’ve just created.
- Update the Android app permissions: Update your app.json with the Android permissions below.
import { ConfigContext } from "expo/config";
const withForegroundService = require("./android-manifest.plugin");

module.exports = withForegroundService(({ config }: ConfigContext) => {
  return {
    ...config,
  };
});
{
"android": {
"permissions": [
"WAKE_LOCK",
"RECORD_AUDIO",
"FOREGROUND_SERVICE_MICROPHONE",
]
}
}Setting Up the Foreground Service
The next crucial step is to create a foreground service for your app. This service will keep your app active in the background, allowing it to continue recording without interruptions. This should be registered outside of any React components as early as possible in your code (e.g. within the project app.tsx or app.jsx file).
import "react-native-gesture-handler";
import AppNavigator from "./src/navigations";
import "expo-dev-client";
import { RootSiblingParent } from "react-native-root-siblings";
import notifee from "@notifee/react-native";

notifee.registerForegroundService((notification) => {
  return new Promise(() => {
    console.log("Foreground service started");
  });
});

const App = () =>  {
  return (
    <RootSiblingParent>
      <AppNavigator />
    </RootSiblingParent>
  );
}

export default App;
Implementing the Notification Channel
To ensure your app remains active while recording in the background, you must set up a notification channel as soon as you initiate the recording process. This channel allows your app to communicate its ongoing activity to the user and the Android system, which is crucial for maintaining service continuity. You should create the notification channel the moment you trigger the recording.
 const startRecording = () => {
    try {
     const permission = await Audio.requestPermissionsAsync();

      if (!permission.granted) {
       return;
      }

      await Audio.setAudioModeAsync({
        allowsRecordingIOS: true,
        playsInSilentModeIOS: true,
        staysActiveInBackground: true,
        interruptionModeIOS: InterruptionModeIOS.DuckOthers,
      });

      const { recording } = await Audio.Recording.createAsync(
        Audio.RecordingOptionsPresets.HIGH_QUALITY
      );

      const channelId = await notifee.createChannel({
        id: "recording",
        name: "Recording",
      });

      notifee.displayNotification({
        title: "Android audio background recording",
        body: "recording...",
        android: {
          channelId,
          asForegroundService: true,
        },
      });

    } catch (err) {
      console.error("Failed to start recording", err);
    }
  }
Final Step: Rebuild and Test Your Application
Now that you’ve configured your app to handle background recording, the last step is to rebuild your app. This process applies all the changes you’ve made, ensuring everything is integrated correctly.
If this guide was helpful, please follow, like, and share to help others find it too.